

TWO video tutorials for this card. An unexpected bonus for you all! =)
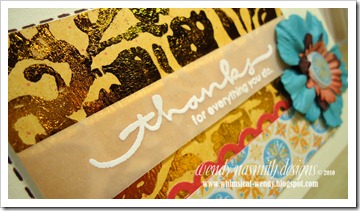 This card used a new technique (well, new to me!) called Hot Foils / Hot Foiling. My wonderful parents bought me some surprise craft stuff for Xmas and this was one of the goodies. I used a stamp set that was part of the same present (thanks M&D! xx). It’s hard to capture in the photos but these foils are GORGEOUS in real life – so shiny and brilliantly metallic. You could never hope to achieve this level of shine with metallic embossing powders, so it’s good that these hot foils are an option.
I also show you two methods of customising your own patterned paper brads. This means that whatever gorgeous patterned papers you have, you can create perfectly coordinated brads to use on your projects. You could use the I-top brad maker by Imaginisce, but this is not widely available (if at all?) in the UK, so I had to come up with a suitable alternative. I hope this idea inspires you to be more creative with your products!
Watch video below | Watch at YouTube
Watch video below | Watch at YouTube
Very cool! Thanks so much for sharing these two techniques, Wendy! I'm going to try the customized brads right away!
ReplyDeleteWhat amazing tutorials you do, they are so informative and simple to follow, thank you.
ReplyDeleteSo glad you got the same results as me with your hot foils (u've even got the same laminator as me!), I thought I was doing something wrong but apparently its not meant for fine details! I accidentally found that it sticks to regular double sided sticky tape too if u just want straight lines, lol
ReplyDelete